How to create custom hooks in React
Learn how to leverage the power of hooks in your React application.

Introduction
Hooks have become an integral part of writing React. They provide a much more convenient way of using state and other react features. The React docs define it as:
They let you use state and other React features without writing a class.
I would guess you are already familiar with the standard hooks that come with React - useState, useEffect, useReducer amongst many others. However, in addition to all these, you can implement your own custom hooks. A custom Hook is a JavaScript function whose name starts with ”use” and that may call other Hooks.
When we want to share the same logic across our components. We can extract the logic to another component and use it anywhere. Hence we can extract that logic to a custom hook.
In this guide, you'll see how I implemented a custom hook and how you can implement yours too. The purpose of this will be to reuse logic while providing a cleaner way to structure your code.
Prerequisites
In order to follow this guide, you'll need to have:
A basic understanding of HTML, CSS, JS
A basic understanding of React
Sample React Project
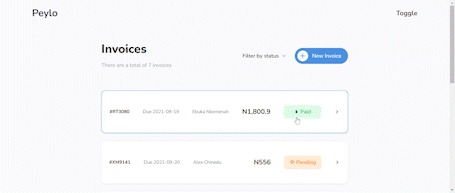
On a recent project I worked on, I have a navbar whose background color and text color changes as the user scrolls past a certain point.
I have a function handleScroll that checks the number of pixels that the document is currently scrolled vertically. The purpose of this is to apply styles conditionally based on the returned value. In this case with the navbar, once the vertical scroll goes more than 50px, I apply a dark background and white text to the navbar and made it stick to the top of the page.
import { useEffect, useState } from "react";

const Header = () => {
  const [scroll, setScroll] = useState(false);
  const handleScroll = () => {
    setScroll(window.scrollY > 50);
  };
  useEffect(() => {
    document.addEventListener("scroll", handleScroll);

    return () => {
      // Cleanup the event listener
      document.removeEventListener("scroll", handleScroll);
    };
  }, []);
  return (
    <div
      className={`${
        scroll
          ? "bg-gray-800 fixed top-0 w-full z-30 text-gray-50"
          : "bg-gray-50 text-gray-800"
      } flex justify-between items-center px-24 h-20`}
    >
      <div className="relative">
        <a href="/" className="font-bold text-3xl">
          Peylo
        </a>
      </div>
      <div>
        <p className="font-bold text-xl">Toggle</p>
      </div>
    </div>
  );
};

export default Header;
For styling, I made use of Tailwind CSS. If you're unfamiliar with using tailwindcss in your react app, you should totally try it out. It's super easy to use. Find how to install it here.
Introducing custom hooks
So say I want to use the same function in a different component? I could simply copy and paste it into the second component. For a small application, it shouldn't be a big deal right? Possibly. But as your application grows, your entire codebase could get muddled up pretty fast.
Again, think for a second that you want to change how the function works, you have to change it everywhere you used the function. You should already see the problem by now, right?
So how do we make things easier for us?
It's always a good practice that if a particular piece of code is frequently used, it might be time for abstraction. Hence we would be able to write this piece of code once and call it multiple times in different components. This is where react hooks come in.
A good point to note with hooks is the use of the prefix use. The react docs recommend you name your hooks following the same convention.
Its name should always start with use so that you can tell at a glance that the rules of Hooks apply to it.
So, since the piece of code we want to abstract checks for the number of pixels of the document that is scrolled vertically, therefore we can name it useScrollHeight. Create a file named useScrollHeight and a function with the same name. Then you can take the piece of code we already have and put it here. Notice, I'm no longer hard-coding the height value as I can now obtain the value for the scroll height dynamically. So the value becomes whatever you decide to pass into the hook.
import { useEffect, useState } from 'react';

export const useScrollHeight = ({height}) => {
    const [scroll, setScroll] = useState(false);
    const handleScroll = () => {
      setScroll(window.scrollY > height);
    };
    useEffect(() => {
      document.addEventListener("scroll", handleScroll);

      return () => {
        // Cleanup the event listener
        document.removeEventListener("scroll", handleScroll);
      };
    }, []);

    return scroll
}
How to use useScrollHeight
You can now use useScrollHeight in any component you like. You can simply execute the hook in the Navbar component by just calling the function and getting its return value.
import { useScrollHeight } from "../hooks/useScrollHeight";

const Header = () => {
  const scroll = useScrollHeight(50)
  return (
    <div
      className={`${
        scroll
          ? "bg-gray-800 fixed top-0 w-full z-30 text-gray-50"
          : "bg-gray-50 text-gray-800"
      } flex justify-between items-center px-24 h-20`}
    >
      <div className="relative">
        <a href="/" className="font-bold text-3xl">
          Peylo
        </a>
      </div>
      <div>
        <p className="font-bold text-xl">Toggle</p>
      </div>
    </div>
  );
};

export default Header;
Conclusion
In this guide, I showed a simple example of how to implement a custom react hook. With hooks, we are able to reuse parts of our code that become repetitive in a clean way. I hope this gives you an idea of how to go about implementing your own custom hooks.
The entire code can be found in this repo on github


